I’m continuing to work with dual-USB pico boards, and used one to recreate my earlier work on a “cheater’s guitar”.
The Cheater’s Guitar
When I was a kid at family gatherings, there was always music. Most of the family would sing, and a few people would play chords on their guitars. When I decided to try making a little music with my son, I wanted to come up with something to make it easier for both of us to play chords without a guitar.
I have an Oberheim Strummer, which tries to do this. (You can see a demo of the Strummer on my YouTube channel). You play a note on a MIDI controller connected to the Strummer’s input and it outputs notes that simulate strumming a chord. There are settings for things like the type of chord and strum style, and it supports four foot pedals, so you’d pick the modes you like and toggle those with the pedals while performing.
After playing with the Strummer, reading the manual, and reading about other approaches, I designed one of my first “MIDI routers” designed to play like a guitar. I called it the “cheater’s guitar”, or “cheatar”.
Version 1
The first version used a full Raspberry Pi (3B, this was a while ago), a touchscreen, a DAC “hat” and speakers for audio, all stuffed into a laser-cut bamboo case:
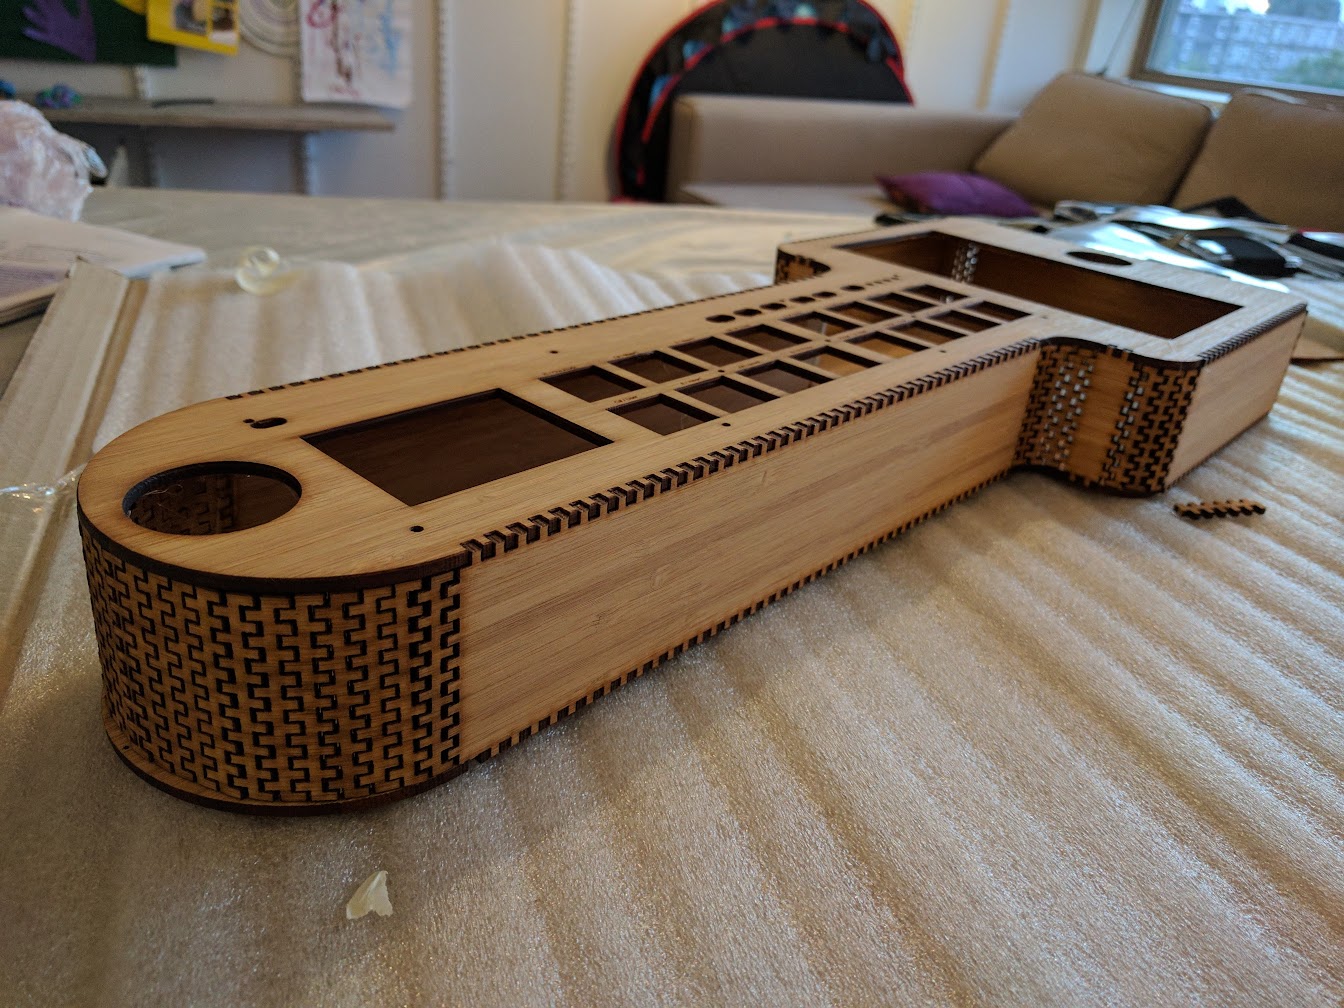
I wrote the software in Infusion, Flocking, and WebMIDI. The software ran in a fullscreen browser. The touchscreen was used to configure things and to display the current state. You can see a finger-picking demo on my YouTube channel.
I eventually added simulated “strums”, and updated the touchscreen to control the guitar key and chord. The strum was still “fixed”, i.e. pressing a pad would play the corresponding “chord”, and always at the same speed and in the same direction.
Version 2
After various attempts, I came up with a second “nano” version that made better use of the Korg Nanopad. I set up the X/Y pad as a kind of “strum”. Like a guitar, you play with one hand and pick the key/chords with the other, and you can strum in either direction. This was a lot more playable than the previous version.
However, I didn’t end up playing it as much. First, it tended to lock up one or two strums in. The second and larger reason I didn’t work on it for a while is that around then I bought my first Novation Launchpad. That first Launchpad and its successors became my focus for a few years.
A Side Trip Through The Grid (Controller)
Among many many other things, I definitely used the Launchpad for guitar-like instruments. I used it like a guitar fretboard. Tapping a pad was like both holding down that fret and plucking the associated string. You can see a more detailed breakdown on my YouTube channel.
This approach was really strong for working with guitar tablature. The position of your fingers exactly matched that notation. It was even good for positioning your fingers to make a chord, as you could just look at the tablature. However, in order to strum, you had to roll your hand across the pads while remembering the position. You can mostly manage it, but it’s slow.
With one Launchpad you were limited to 9 or 10 frets (depending on the model of Launchpad), so eventually I made this giant guitar fretboard spread across three Launchpads.
Version 3
Fast forward to this year. After trying OGX Mini on a dual-USB pico board and writing my first “MIDI transformer” for a microcontroller, I started looking at older projects to see which I could revive in a microcontroller format.
I tried working with the Novation Launchpad first, but I couldn’t ever get a Launchpad to power on when connected to the host port of a dual-USB pico. (More on that in a bit.) While checking to see which of my MIDI controllers actually did work, I tried the Korg Nanopad 2, which worked, and which meant that reviving the cheatar was a perfect next project.
I started by reviewing the old code and trying the previous demo. It stil worked, but still had the same issues with locking up after a few strums (I suspect because I was passing around too much information between the note-producing bits and the UI).
After a few days reviewing guitar theory and doing some C programming, I came up with an updated version that runs on a dual-USB Raspberry Pi Pico (or variants). It’s very similar to version 2, the pads configure the chord/key, and the X/Y pad “strums”.
Unlike version 2, the microcontroller version is much much more stable. You can fast strum, slow strum, and strum over and over without any hangups. Suddenly it’s possible not just to strum a few times, but to strum in patterns (down, up+down, up+down, up, for example). Best of all, as the strum is based on how you move, it sounds very natural. Here’s a quick demo I recorded:
If you have a Pi Pico, Pico 2, or variant of either, you can get the code from the repository on GitHub. The hardware and software requirements as well as usage instructions are covered there.
What’s Next?
Although I’m hugely pleased with what I have so far, it does still need work. Without a screen, it’s too hard to tell which chord/key is active, and given that repeatedly pressing the same chord changes the way it works, you can often end up flailing around between keys and major/minor chord schemes. In short, it needs some kind of display, even if it’s just a few LED characters or a few lights. It also intermittently simply doesn’t work until you reset the USB hub (see below). So I have a few key things I need to learn to make this project better and build other projects.
A Little Light(s) Reading
Both the Adafruit and Waveshare units include a NeoPixel, which I’d like to use to give more feedback about the status (which key, chord, et cetera).
The library I use for NeoPixel work on the Pico is a C wrapper around an Adafruit Python library. Unfortunately, it’s not well maintained and doesn’t work in my current build environment. Although I could probably go further down that hole and figure out why, the library hasn’t been updated in four years, and seems like it’s basically holding me back.
The demo code included on the Waveshare wiki just writes its own PIO code to manage the light. Under the hood, the Adafruit Neopixel library does the same. So, it seems like the first thing I need to learn is a bit of PIO.
Although there will likely be a little learning curve, I hope it’ll make things easier in the long term, both in terms of having maintained code to rely on, and in terms of building my understanding of PIO for other projects.
USB Host Issues
Another big issue is that something is going on with these boards and their USB host ports. I intermittently have to reset my USB hub in order to power the board. I’ve also noticed that I can’t power a second microcontroller off of the USB host port, which prevents me from “chaining” units like guitar effects pedals. I have a USB power monitor that will hopefully help me see if it’s just a power issue, in which case I’d need to make sure things also work with a powered USB hub.
There are also some issues specific to the Novation Launchpad. Even with an external power adapter, the Launchpad never recognises that it’s connected to a host. Perhaps there’s something I need to do in one of the host callbacks to convince it.
Conclusion
This has kind of been an ideal project for after the summer, not only am I motivated to keep fixing it up, but I have key and useful things to learn that seem pretty doable.
That’s it for now, thanks for reading, and stay tuned for whatever’s next.