Strap yourself in, this is a long journey to attempt to achieve a seemingly simple goal.
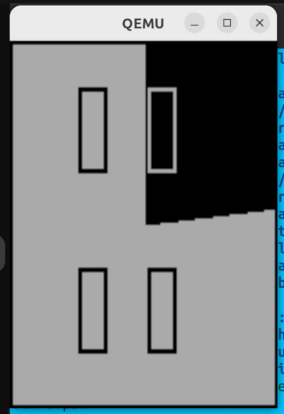
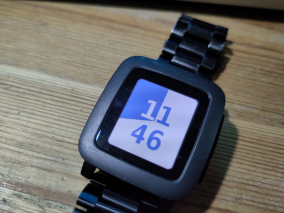
In part one, two, and three of this series, I worked my way towards making a watch face for the newly revived Pebble. I managed to get a passable version working with bitmap images for each digit displayed on the watch face. This has been my daily driver for a couple of weeks, and I like it a lot:
The next step was to add colour, which I thought would be best accomplished by using a font that could be drawn in any colour, rather than the bitmap images I have at the moment, which are either black or white.
For my bitmapped version, I used the free Deja Vu Sans font, and thankfully the licensing for that font is reasonable, so I decided to use it for this effort.
In the world of Pebble apps, a font (like an image) is a resource, a piece of
media that you register in your appinfo.json or package.json file. To cut
to the chase, that section looks something like:
    "resources": {
      "media": [
        {
          "type": "font",
          "name": "FONT_DEJA_VU_SANS_60",
          "file": "fonts/DejaVuSans.ttf"
        }
      ]
    }
The first thing I wanted to point out is that you have to follow their naming
convention. The last bit of the name indicates the pixel height of the font,
i.e. the trailing _60 is actually data. Also, name gets wrapped and has to
be referred in code to as something like RESOURCE_ID_FONT_DEJA_VU_SANS_60:
deja_vu_sans_font = fonts_load_custom_font(resource_get_handle(RESOURCE_ID_FONT_DEJA_VU_SANS_60));
For fonts, there seems to be some kind of prerendering stage where bitmaps are generated for each character, and there are limits on the size that is recommended (48 pixels) and the size you can get away with (60 pixels for some fonts). An error is thrown during the build stage if your generated font data takes too much memory.
One way of reducing the memory footprint is limiting the font to the characters you actually use, but sadly that guide seems to have been written for people using a tool like the (now defunct) CloudPebble, and they never actually mention the field name to use in the manifest.
Thankfully, their code is now open source, so I could just go and take a look.
It turns out that they’re using JSON Schemas, which
I used quite a bit ten years ago. The schema for the appinfo.json
file
provides the details we need. There’s a characterRegex property we can use to
limit to just digits.
Their example doesn’t really make it clear how much regex they allow, and their
schema only indicates that they accept a string. Their examples make it look
like you should use square braces to indicate what should match a single
character, which in our case is just the digits, i.e. [0-9]. This seemed to
work. Here’s the updated snippet:
    "resources": {
      "media": [
        {
          "type": "font",
          "name": "FONT_DEJA_VU_SANS_60",
          "file": "fonts/DejaVuSans.ttf",
          "characterRegex": "[0-9]"
        }
      ]
    }
During the build, I could see things going better (no warnings, smaller file sizes) with the regular expression. However, that was fool’s gold, in that the results were not what I needed. The font I used doesn’t throw any warnings, but every character is displayed as a square box, as in:
Hilariously, my early test data used all zeroes as the initial digits, so it took me ages to figure out that the squares were not badly rendered zeroes, but rather an indication that the font hadn’t been usefully imported. I tried it without the regular expression, it didn’t make a difference.
Using one of their example custom fonts, I could at least confirm my understanding of how custom fonts work. The “suffix as data” convention led me to believe that I might be able to scale another font. I tried scaling the font they use in their tutorials to 60 pixels, but hit the memory warning.
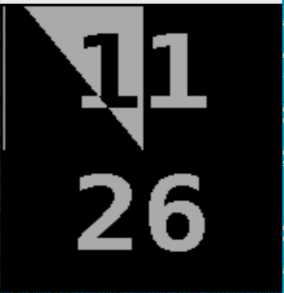
So I tried the largest built-in font (49 pixels), which looks like:

Although there’s now room for other information, the look of the text is not great. On a last minute impulse, I decided to give the custom font another try. By downloading the original fontforge files, I was able to generate a compatible TTF file. I tried a few variations, the largest I was able to generate was 60 pixels:
It’s not perfect, but it’s much closer to the original vision, and once I adjusted the alignment to account for the smaller size, I was able to move on to adding support for colour.
As I’m inverting rather than replacing colour, I need to use colours that are each other’s true inverse in the (A)RGB space. As there are three channels and then “all channels”, that gives us four possibilities with one or more colour channels at maximum intensity:
- White and Black
- Red and Cyan
- Green and Purple
- Blue and Yellow
The Final Results
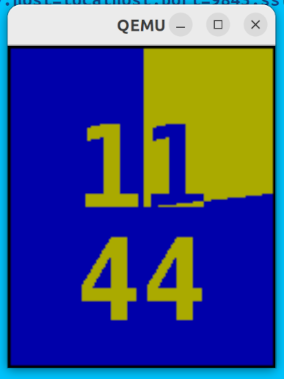
So, the colours look fine on the emulator:
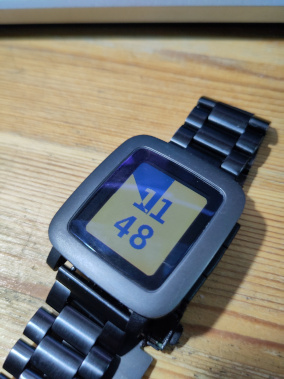
Unfortunately, on a real device, the colours are a lot more washed out. Here’s a shot without the backlight:
It looks a lot worse in person, and it’s even worse if you activate the backlight (which I do a lot at night):
The Next Refuge of a Scoundrel
If I’m going to keep going with this, first of all I need to figure out if there are any options to improve the contrast for the colours. Perhaps I’ll make a quick colour swatch example just to confirm that my layering or my inversion algorithm isn’t somehow watering down the colours.
I also really don’t like the look of the custom font, it’s just too small. I have a backup plan, which is to use the existing bitmaps a little differently. In the previous verson, I was loading 20 bitmaps (10 black, 10 white), and using the Pebble C SDK drawing functions to draw whichever was required for the current colour background.
What if I used 10 of them as a kind of bit mask, where the white pixels indicate where in the image to invert the background? I could use a variable to flip the state, so that I wouldn’t need the other ten images.
It looks like I can easily read each line of data in a bitmap, which lines up well with working with a frame buffer.
We’ll see whether I feel like going that far. If you’re curious about the code for this effort, I checked the work in progress into a branch in my GitHub repository.
Stay tuned for whatever’s next.